Back to Contents Page
Chassis Intrusion Switch
Dell™ OptiPlex™ GX620
User's Guide
 Removing the Chassis Intrusion Switch
Replacing the Chassis Intrusion Switch
Resetting the Chassis Intrusion Detector

|
CAUTION: Before you begin any of the procedures in this section, follow the safety instructions located in the Product Information Guide. |
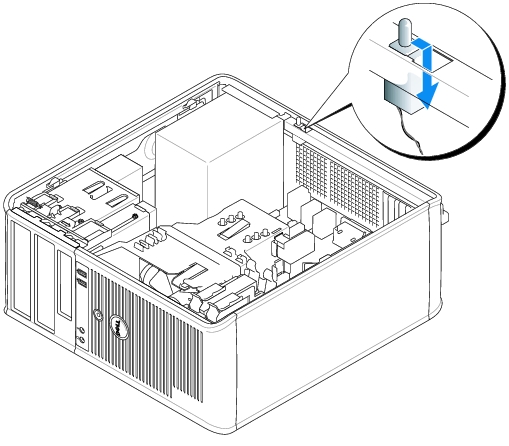
Removing the Chassis Intrusion Switch
- Follow the procedures in "Before You Begin."
- Disconnect the chassis intrusion switch cable from the system board.
Note the routing of the chassis intrusion cable as you remove it from the chassis. Chassis hooks may hold the cable in place inside the chassis.
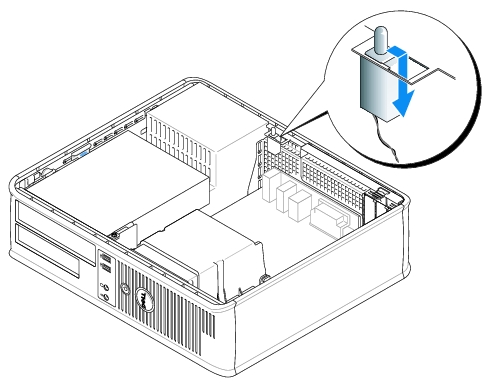
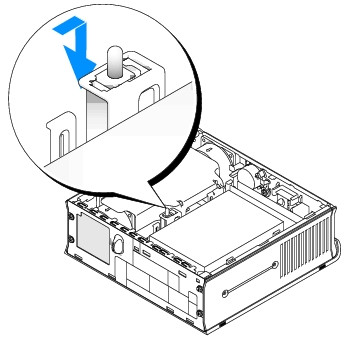
- Using a flat blade screwdriver, gently slide the chassis intrusion switch out of its slot, and
remove the switch and its attached cable from the computer.
Mini Tower Computer
Desktop Computer
Small Form Factor Computer
Ultra Small Form Factor Computer
Replacing the Chassis Intrusion Switch
- Gently slide the chassis intrusion switch into its slot and reconnect the cable to the system
board.
- Replace the computer cover.
- Attach the computer stand, if it is used.
Resetting the Chassis Intrusion Detector
- Turn on (or restart) your computer.
- When the blue DELL™ logo appears, press <F2> immediately.
If you wait too long and the operating system logo appears, continue to wait until you see the Microsoft® Windows® desktop. Then shut down your computer and try again.
- Select the Chassis Intrusion option and then press the left- or right-arrow key to select Reset.
Change the setting to On, On-Silent, or Disabled.

|
NOTE: The default setting is On-Silent. |
- Press <Alt><b> to restart the computer and implement your changes.
Back to Contents Page